With the last look on the mirror, I lowered my head and lightly splashed the water on my face.
Disclaimer: I'm not a professional makeup artist, I still draw uneven brows and uneven eyeliners, this is my look only.
Maybelline Baby Skin Pore Eraser is somehow similar to The Porefessional from Benefit and a great dupe for it , it leaves my skin feeling smooth and supple. It's also an excelled base to apply foundation and concealer. It's breathable, however, it causes the skin to grease up before finishing my makeup routine, but other than that, it's pretty good.


I'm not the type of teenager that wears makeup whenever I have a hang-out with my friends. At most, I would apply a colourless lip balm across my (pulp) lips and wipe it off again 20 minutes later. However, being a traditional Chinese dancer, I took part in many dance competitions and I was exposed to makeup ever since I was 5. Despite all the sweet compliments from the adults, I admit I do love having rosy cheeks, but not 'harsh-looking' brows and cherry red lips.
I first picked up a makeup brush at the age of 15, when I was cast in a play in my school and a helpful lady had helped trim and shaped my brows, and that was the first time I actually loved my brows as O was born with uni-brows. I tried trimming and shaping my brows later on my own, messing around with my mom's makeup products, and gradually started to purchase makeup products for myself even though, I, sometimes regret splurging on them.
I still don't wear makeup often unless I want to hide certain flaws (like pimples, scars, etc.) or during special occasions, events and dinners. This is my makeup look that I usually wear every time I go for my special occasions.
Disclaimer: I'm not a professional makeup artist, I still draw uneven brows and uneven eyeliners, this is my look only.
I will start with a freshly-washed face and toner applied to the skin. Next, I would use my Maybelline Baby Skin Pore Eraser and apply it all over my face,
Maybelline Baby Skin Pore Eraser is somehow similar to The Porefessional from Benefit and a great dupe for it , it leaves my skin feeling smooth and supple. It's also an excelled base to apply foundation and concealer. It's breathable, however, it causes the skin to grease up before finishing my makeup routine, but other than that, it's pretty good.

Next, I apply my Missha Panda's Dream Brightening Eye Base to lighten my dark under-eyes and eye bags, gently dabbing it with ring finger.
Missha Panda's Dream Brightening Eye Base is really not easy to blend and require a lot of blending and spreading all over the eyelid as it has a thick consistency. However, it covers the dark eye circles pretty well and it's long lasting.

Using Innisfree Air Skin Fit BB Cream SPF35 PA++, I gently tap the product onto my skin and then use a damp beauty blender and dab it evenly on the skin. I like to apply using the polka dot method which makes my uneven skin tone more even.
I find Innisfree Air Skin Fit BB Cream SPF35 PA++ to be really fair compared to other brands. It is also quite close to my skin colour and gives off a pretty good coverage, giving a healthy glow and even skin tone.

Next, I apply Clio Professional Kill Cover Concealer in the shade #2 Beige to conceal my red spots, under-eyes and pimples on my face.

Clio Professional Kill Cover Concealer in the shade #2 Beige is absolutely my favourite concealer I had ever used. It gives a super good coverage and manages to cover my pimples, blackheads and pimple scars. It blends pretty easily, it's very creamy and has a dewy finish.

After that, I pat on my Innisfree Mineral Ultrafine Pact cushion foundation onto the skin to give a matte look because I'm not a huge fan of the dewy skin look as I have oily to combination skin.

I powder my face with some pressed powder from Max Factor X Cream Puff on my T-zone and cheek area.
Next, to my brows, I'm using both Rimmel London Eyebrow Pencil in the shade Black and Heavy Rotation Eyebrow Palette medium shade and the darkest shade to fill in and shape my brows. After that, I mix the medium shade and the lightest shade to contour my nose area before blending them together.

Rimmel London Eyebrow Pencil in the shade Black's pigmentation is pretty good however I'm not a big fan of the brush because it is very harsh and the brush does not blend well, but the pencil itself is easy to blend, however the pencil can be easily rubbed off.

Heavy Rotation Eyebrow Palette is a from Japanese brand which I couldn't the name, the colour is very pigment it is very easy to use especially for beginners, plus, it's quite waterproof as well.
Moving onto my eyes, I'm using the Missha Eye Primer cream as base.

Missha Eye Primer cream is very creamy and does keep the eyeshadows in place, however it's too pale for my skin tone and requires a lot of blending to avoid the eyelid looking oily.

Afterwards, I'm using Maybelline The Blushed Nude Palette with Smokey Taupe to fill in my whole eyelid as a base, then Flushed on the center of the lid, Lingerie on the inner corner of my eyes and Angel on the outer corner and lower lid of my eyes, give off a smokey eye look. I also used Flushed to blend into my crease for depth.
Maybelline The Blushed Nude Palette color intensity is not really that pigmented, unfortunately. It requires many layers of application for the colour to be visible and pigmented, but I admit, the colours in this palette are stunning. It has some shimmery shadows to make the eyes pop. It's more on the neutral side and it is suitable for those who prefer natural makeup look on an everyday look.

I'm really a big fan of Maybelline as it is really affordable and easy to get, and also, the results aren't disappointing either.
I'm using my absolute favourite eyeliner which I had purchased for the second time. Maybelline Hyper Sharp Wing Liner is very thin and has a sharp tip that helps to give off a cat-eye or a cat-wing line.

Maybelline Hyper Sharp Wing Liner eyeliner is very, very, very easy to use and it gives from the thinnest to the thickest line. It's very pigmented and sweat-proof, waterproof and smudge-proof, but only when it dries. It can last up to 10 hours, before it slowly disappears without creating a black smudge, which is why it has been my favourite eyeliner of all time.
Moving on to contour, I'm using Too Cool For School Art Class by Rodin createur du contour palette. I like to mixe all the shades together and contour my nose and cheekbones as well as my jawline.

I understand clearly why Too Cool For School Art Class by Rodin createur du contour palette is worth the hype. The packaging, first of all is so awesome and it gives off a very natural look, unlike other brands, it is very light and blends easily. Sometimes, its hard to tell that I actually have a contour as it is suitable for fair skin.


Next, I'm using the Chanel Contour Colour #20 Mirage as blush

Chanel Contour Colour #20 Mirage gives a cute, innocent, flush of pink colour with a blush brush. It's very pigmented and of course, it gives a healthy, rosy look, but I'm not a big fan of brush as it didn't pick up the colour of the blush as I hoped it would.
For highlight, I'm apply e.l.f Shimmering Facial Whip Lilac Petal on my T-zone area and above my cheekbones.

e.l.f Shimmering Facial Whip Lilac Petal is surprisingly pigmented when I first used it. I was quite disappointed when I first saw how small it was but the pigmentation is beyond words, but still it's very natural and not too dramatic which I prefer. It is easier to blend with my fingers compared to using a brush. I find this product very cheap as it only costs USD$1! Even though it's pretty small in size, but overall the result is amazing.

Back to the eyes, I had used NYC White Eyeliner Pencil to line my lower waterline and the inner corners or my eyes.
Then, I apply my Maybelline Volume Express the Rocket Mascara after curling my eyelashes. Normally, I would apply my Maybelline Lash Sensational Mascara on my bottom eyelashes for volume and length.

NYC White Eyeliner Pencil is very pigmented and colour pay-off is remarkable and not smudgy, but it is not really long lasting.
Maybelline Volume Express the Rocket Mascara gives volume and length, it does a good work im separating the lashes, but it can easily be smudged and not exactly waterproof as it is said.
Maybelline Lash Sensational Mascara gives good length and curls the lashes pretty well and does not smudge easily, however it's pretty hard to remove. It can only be removed by a effective cleasing oil and lots of rubbing.

Last but not least, my recent and favourite, Colourpop Ultra Satin Lip in Magic Wand.

Colourpop Ultra Satin Lip in Magic Wand shade is super pigmented and creamy. It's super pigmented with only one coat and definitely not drying. It kinda looks matte, but it's not smudge-proof. It comes with a doe-foot applicator and it is easy to apply when you're on the go. It also easily shapes my cupid's bow.

And that's the final look!!

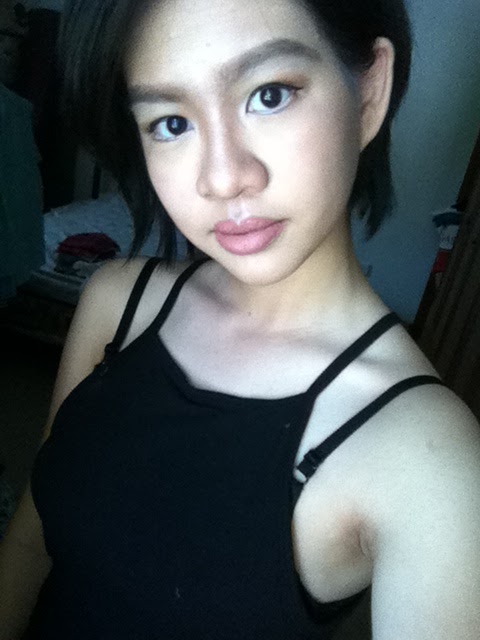
For comparisons, here's a picture of me with and without makeup.

I wouldn't say there are dramatic changes of me in makeup or without makeup. I just look more awake, alive and mature, according to my friends. A few people told me before that I look better without makeup because I look more younger and natural.
However to me, makeup is a process of growing up. And no, I don't wear makeup to impress anyone and yes, I wear makeup to hide the flaws I don't think I deserve.
"Makeup is not a mask that covers up your beauty. It's a weapon that helps you express who you are from the inside,"- Michelle Phan.